Visual Recognition with IBM Watson, HERE and Python - Part 1

Introduction
Many times, you want to search a restaurant which serves a specific dish. And you know the possibility of remembering name of that dish is bleak, but you took a picture last time you had it. In such situation a feature to search a dish by image is sorely missed. In this blog we are going to learn how to create an application to find restaurants with the help of food image you have. You will also learn how to work with IBM Watson for Visual Recognition and use HERE location services for maps and location analytics.
Prerequisites
To start with Image Recognition, you will need:
- An IBM Cloud account (you can sign up here)
- Python 3.8 and pip
- Freemium account on HERE Developer portal
From IBM Cloud, you need to access Watson and create a Visual Recognition service. From the created service, you have to acquire the API key for performing operations through the API.
You will also need an API key from the HERE Developer Portal (which we will use in the code). Simply sign up for your free account and generate API key on your account page.
For coding, your machine should have Python installed (I have Python 3.8).
In this part, you will learn to run image recognition code on your machine and extract the required result from the JSON response. (We will cover the location element in next blog post).
Lets get started then!
Creating Visual Recognition Service and Acquiring API key
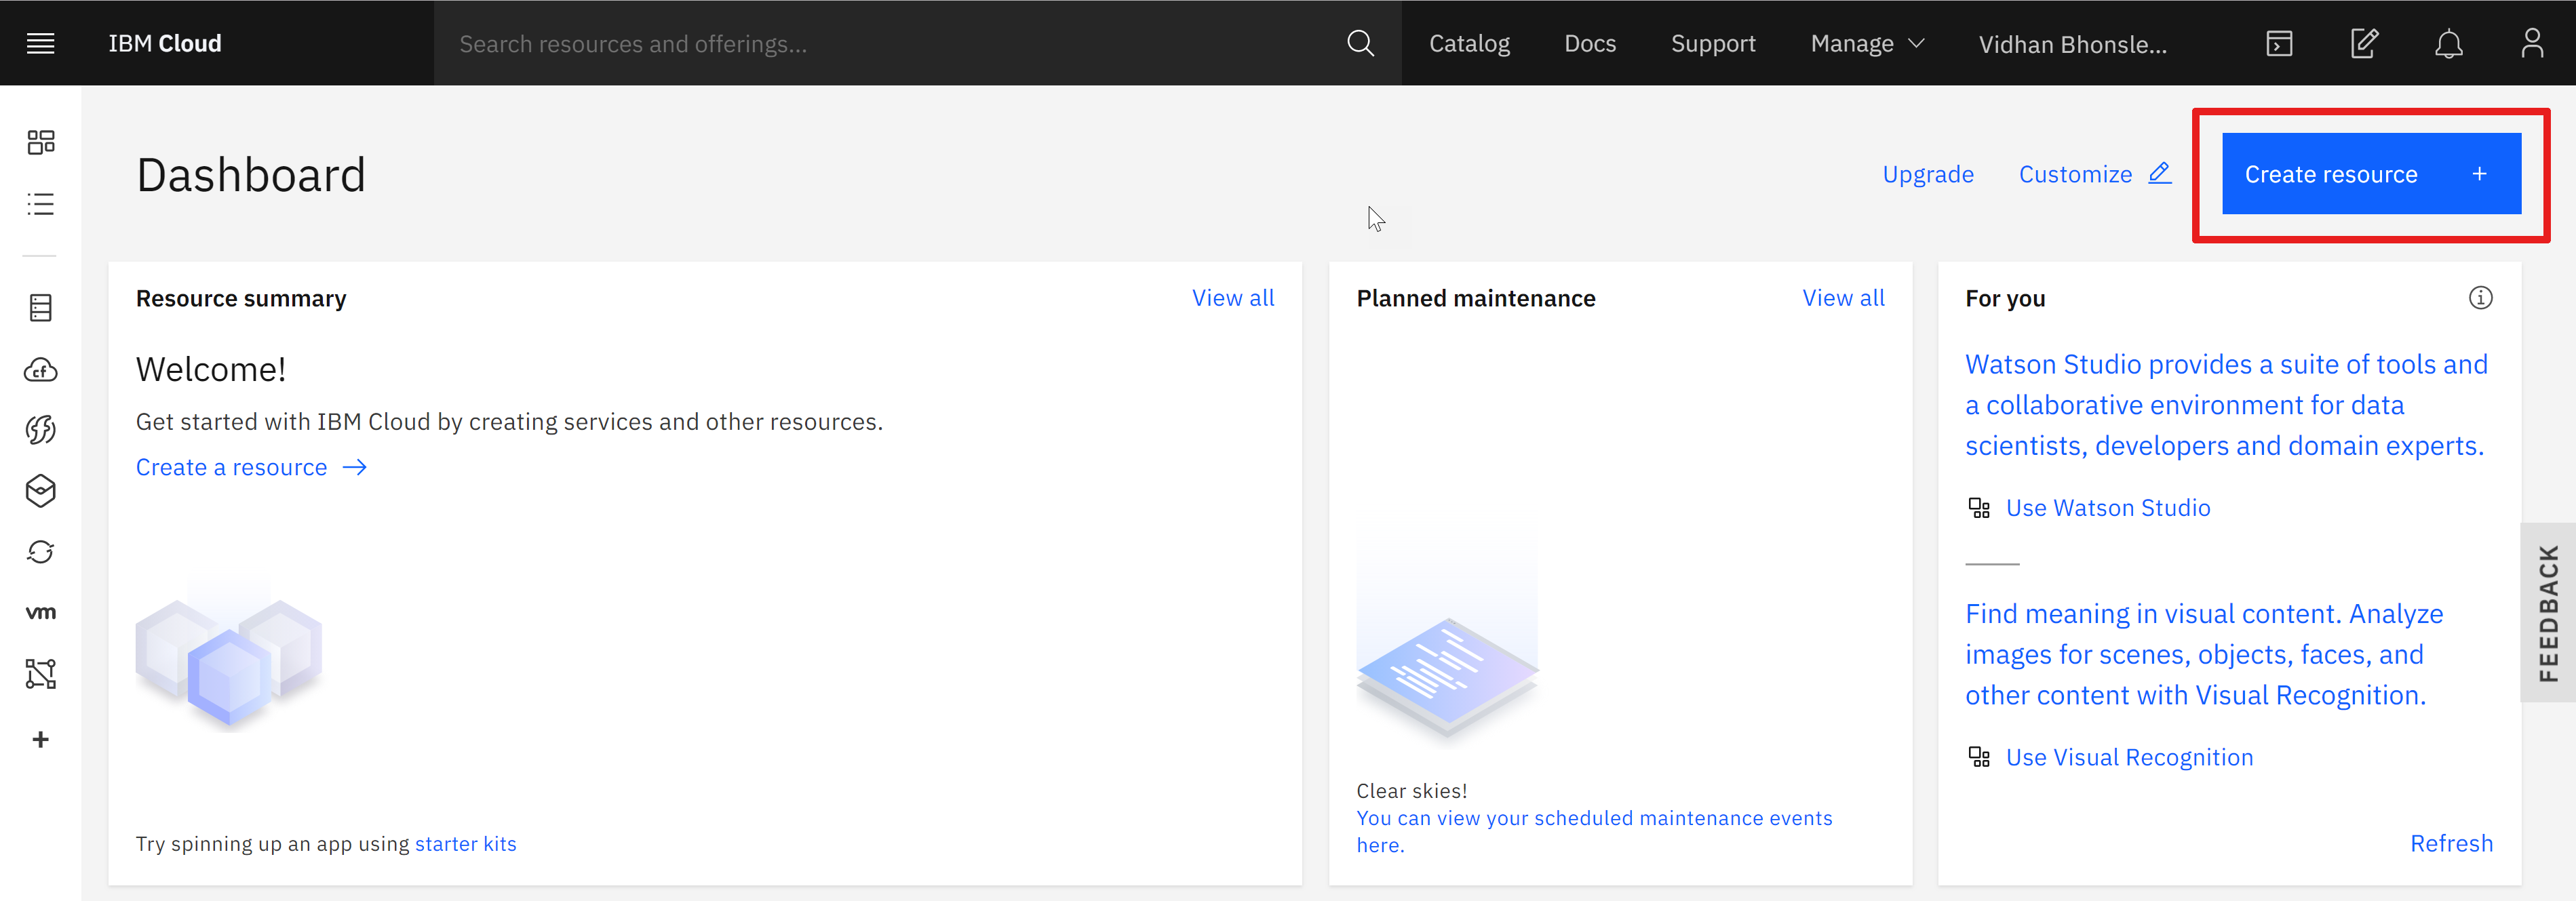
After logging into your IBM Cloud account, you will be on the dashboard page. You need to create a service by clicking on 'Create resource' (as shown in the image below).
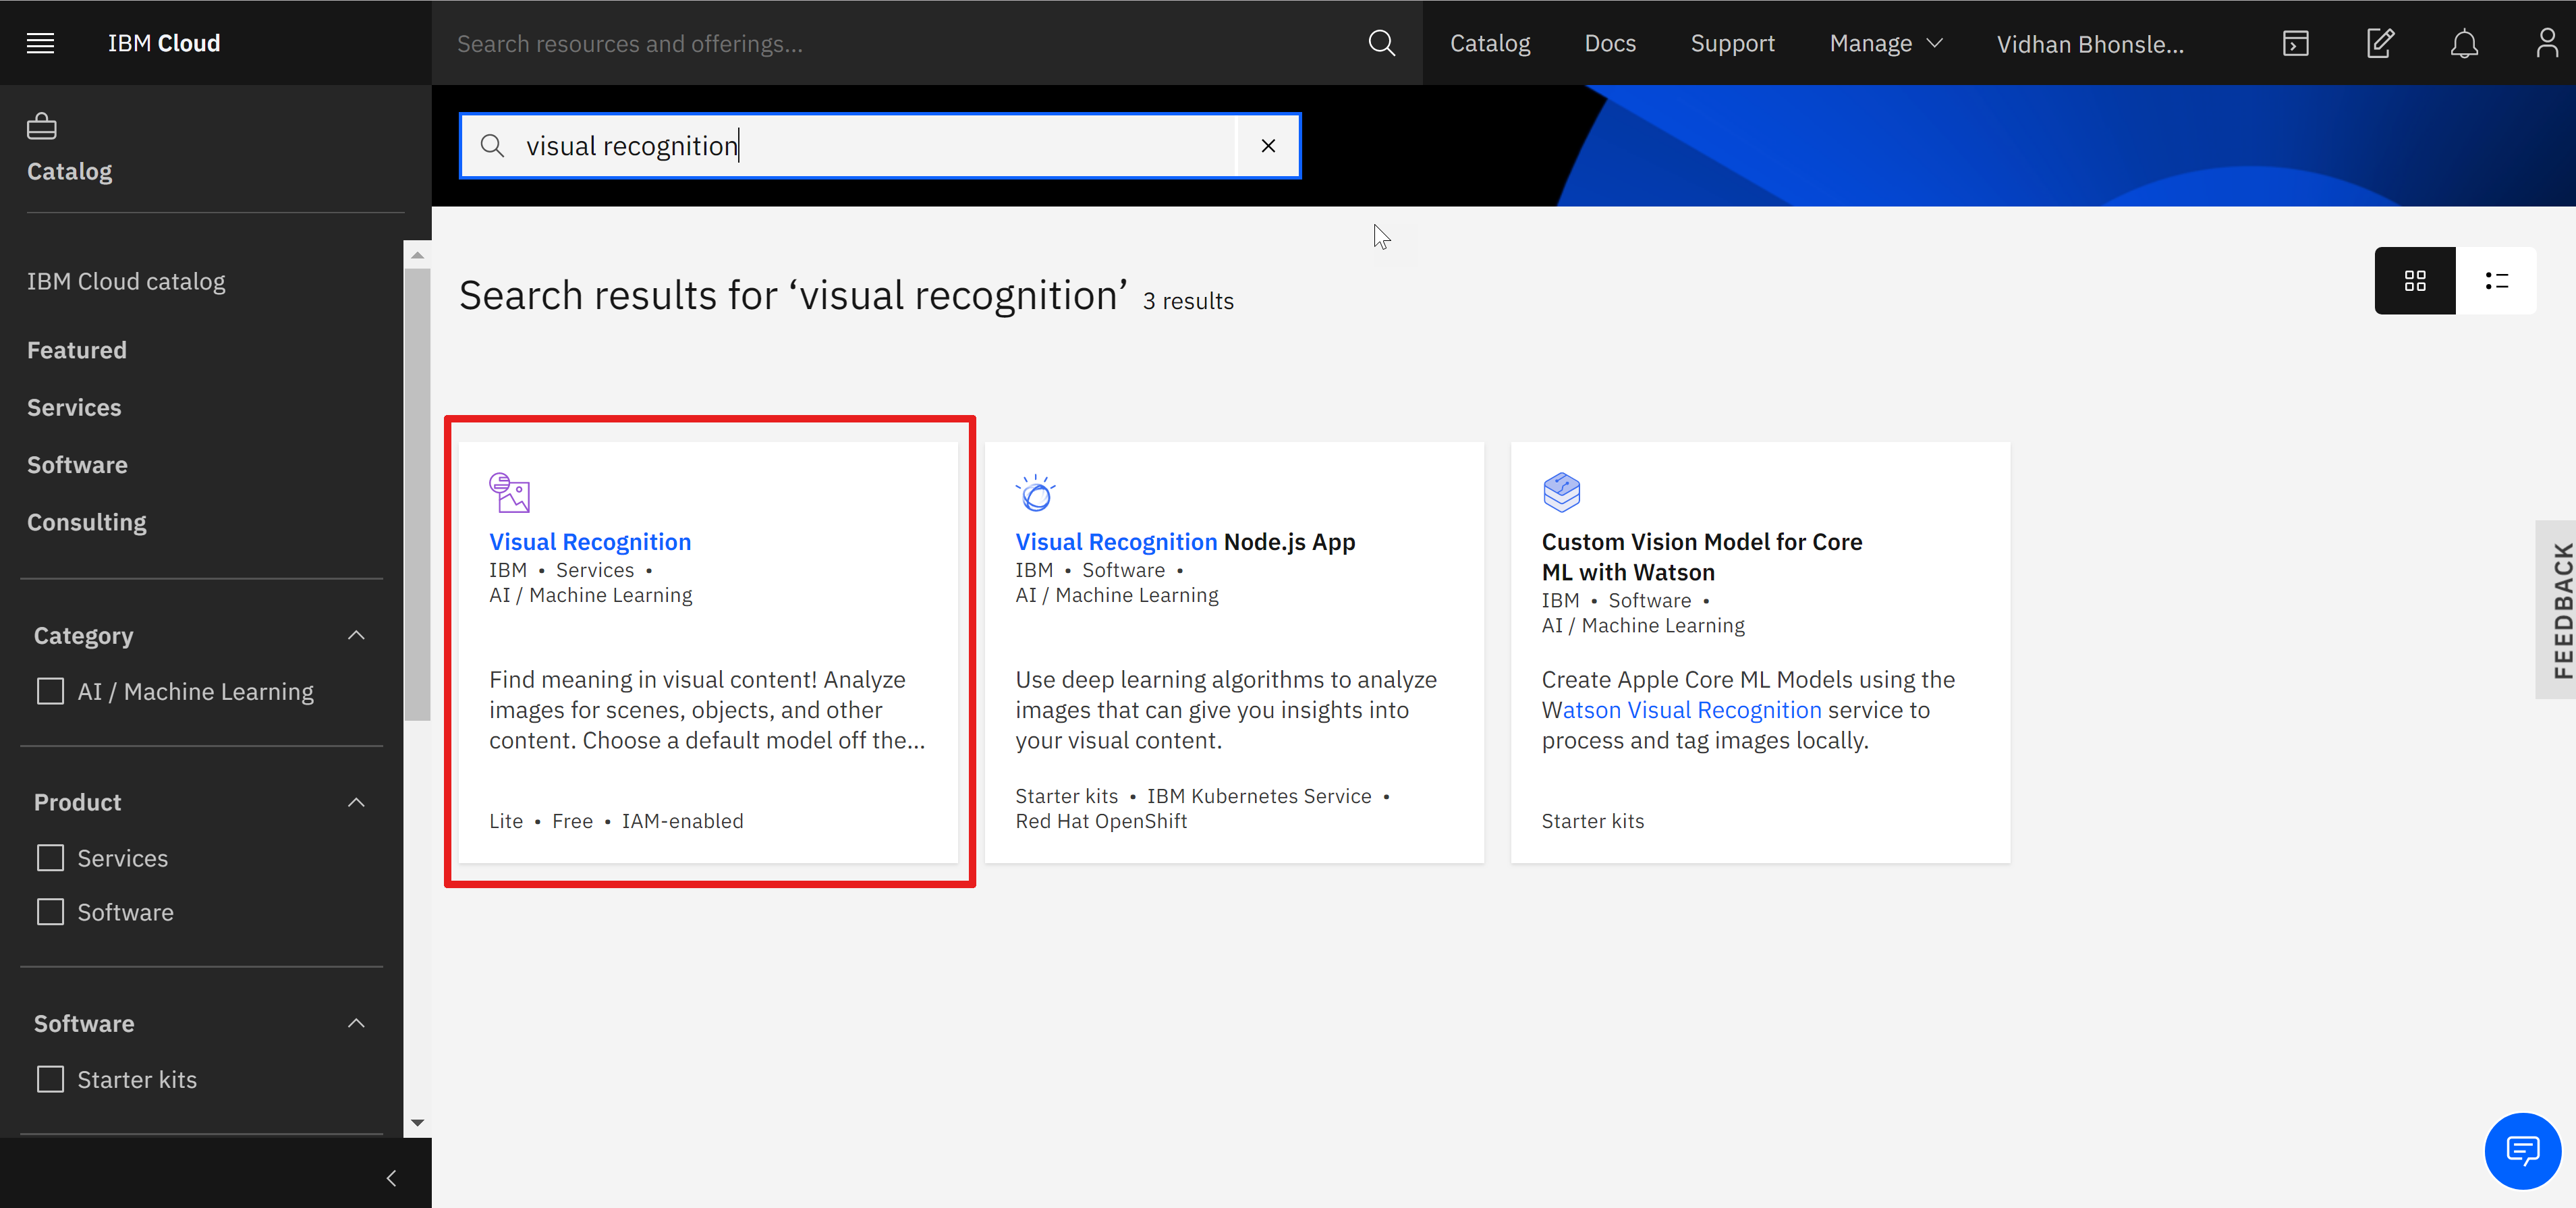
This will take you to the IBM Product Catalog page. There, search for 'visual recognition' (as shown below) and select the first option.
 The Visual Recognition service uses deep learning algorithms to analyze images for scenes, objects and other content. And it also has a set of built-in models for ease of use.
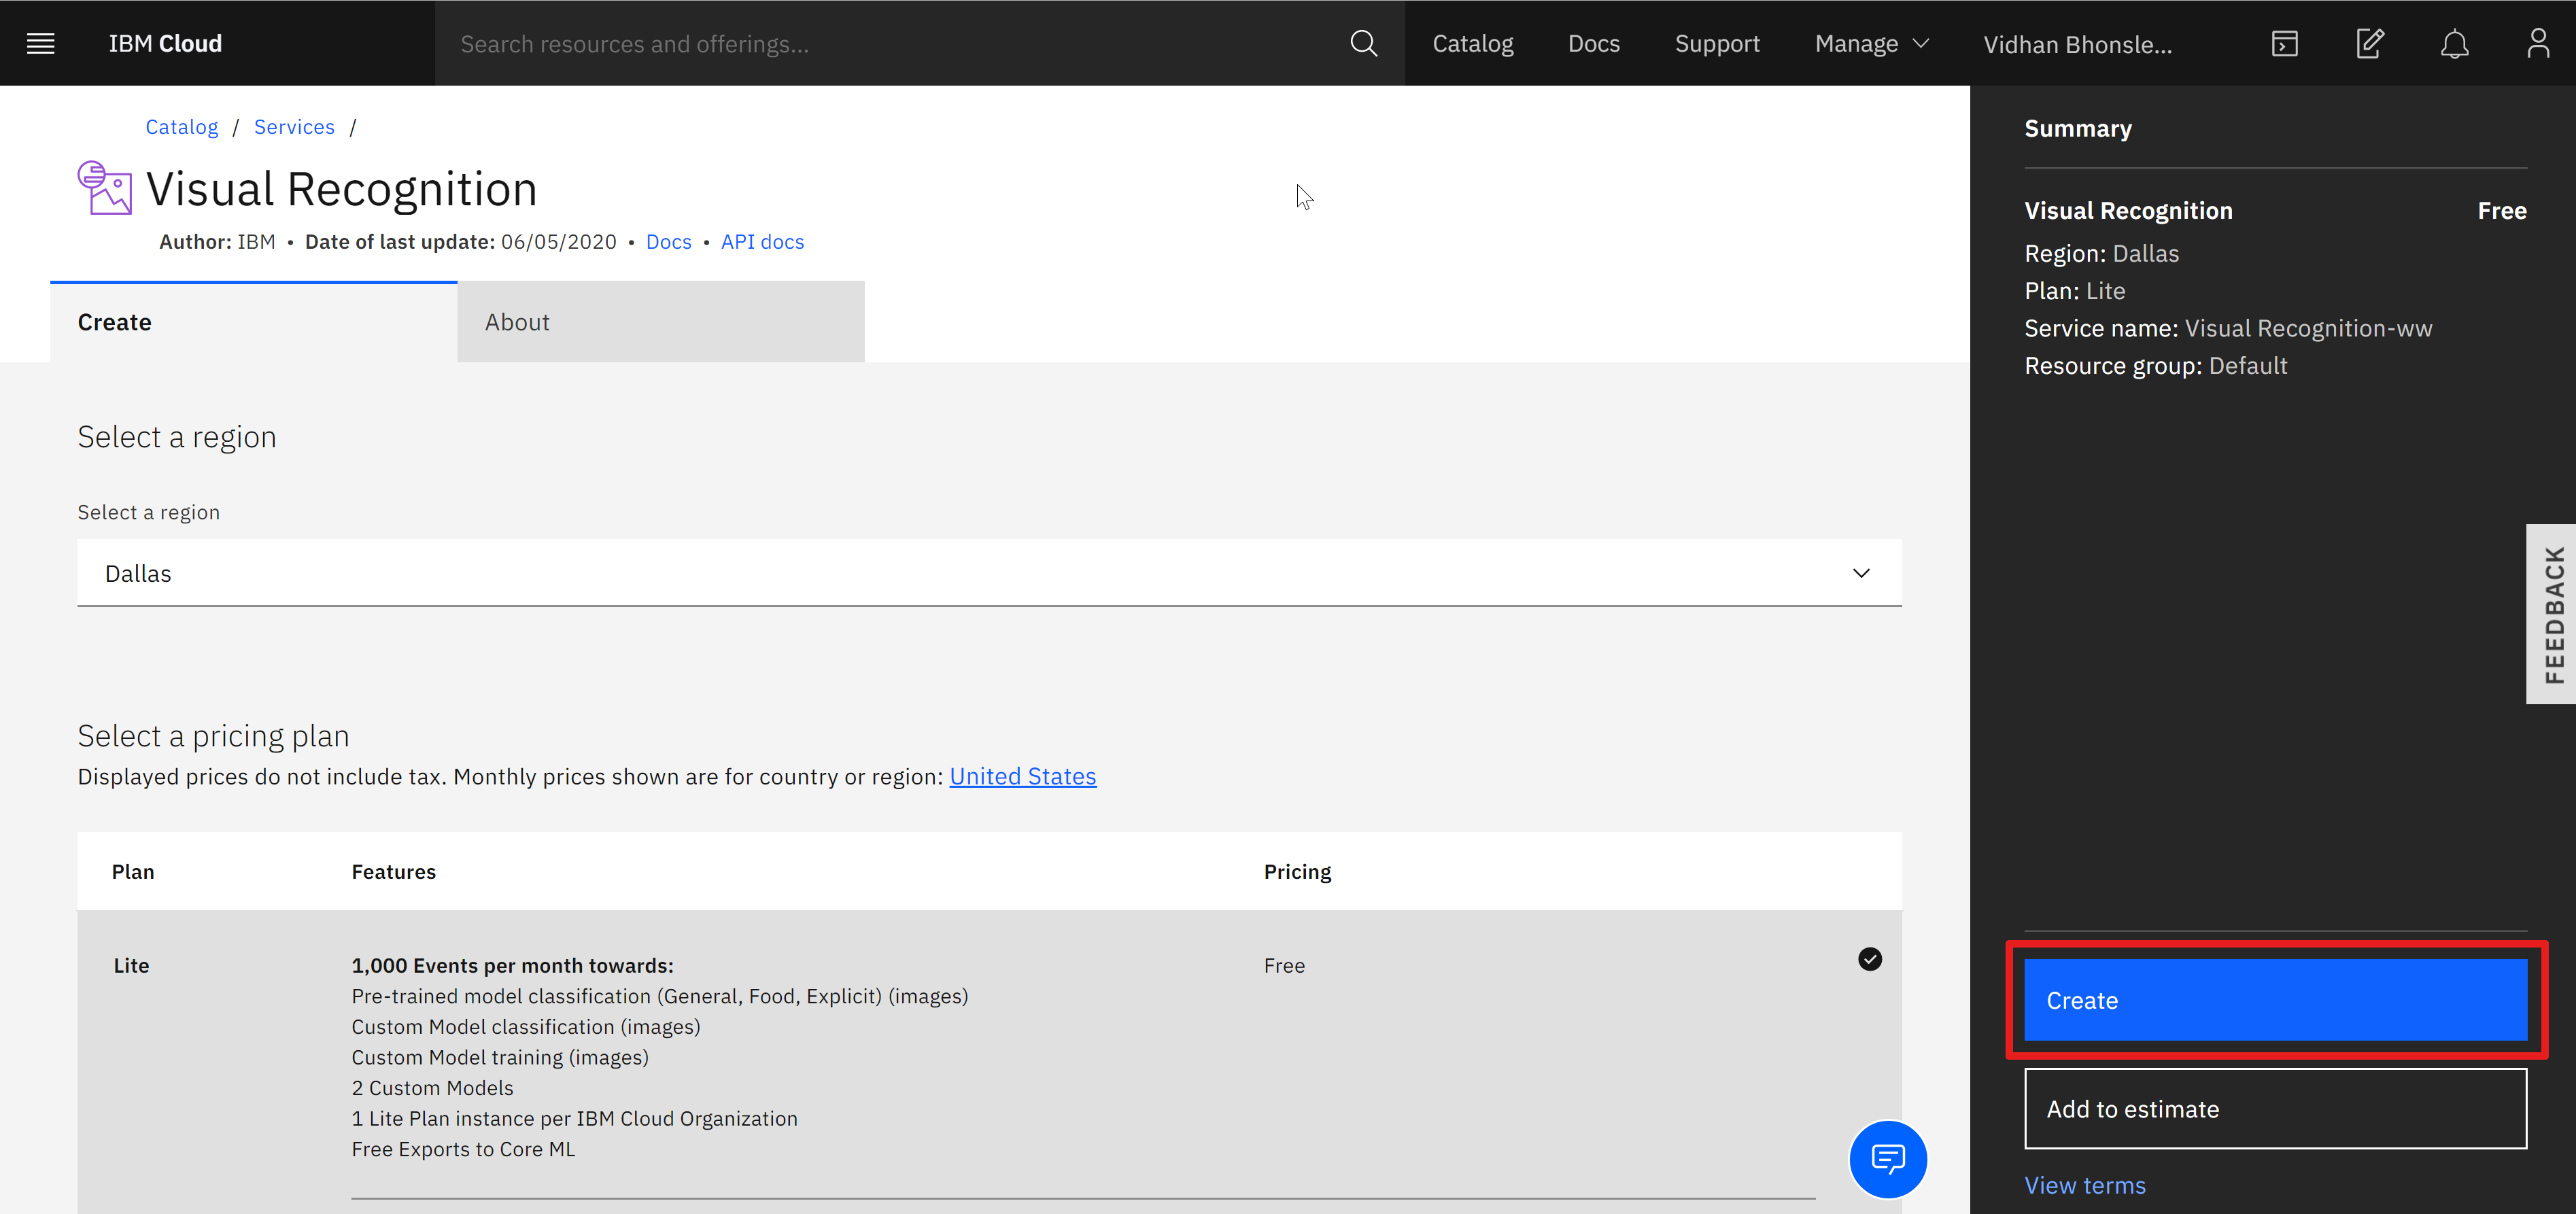
You will reach a page where you have to select the region and configure resources. It can be edited as per your wish or can be left unaltered (see the below image). Then click on 'Create' to move to the next step.
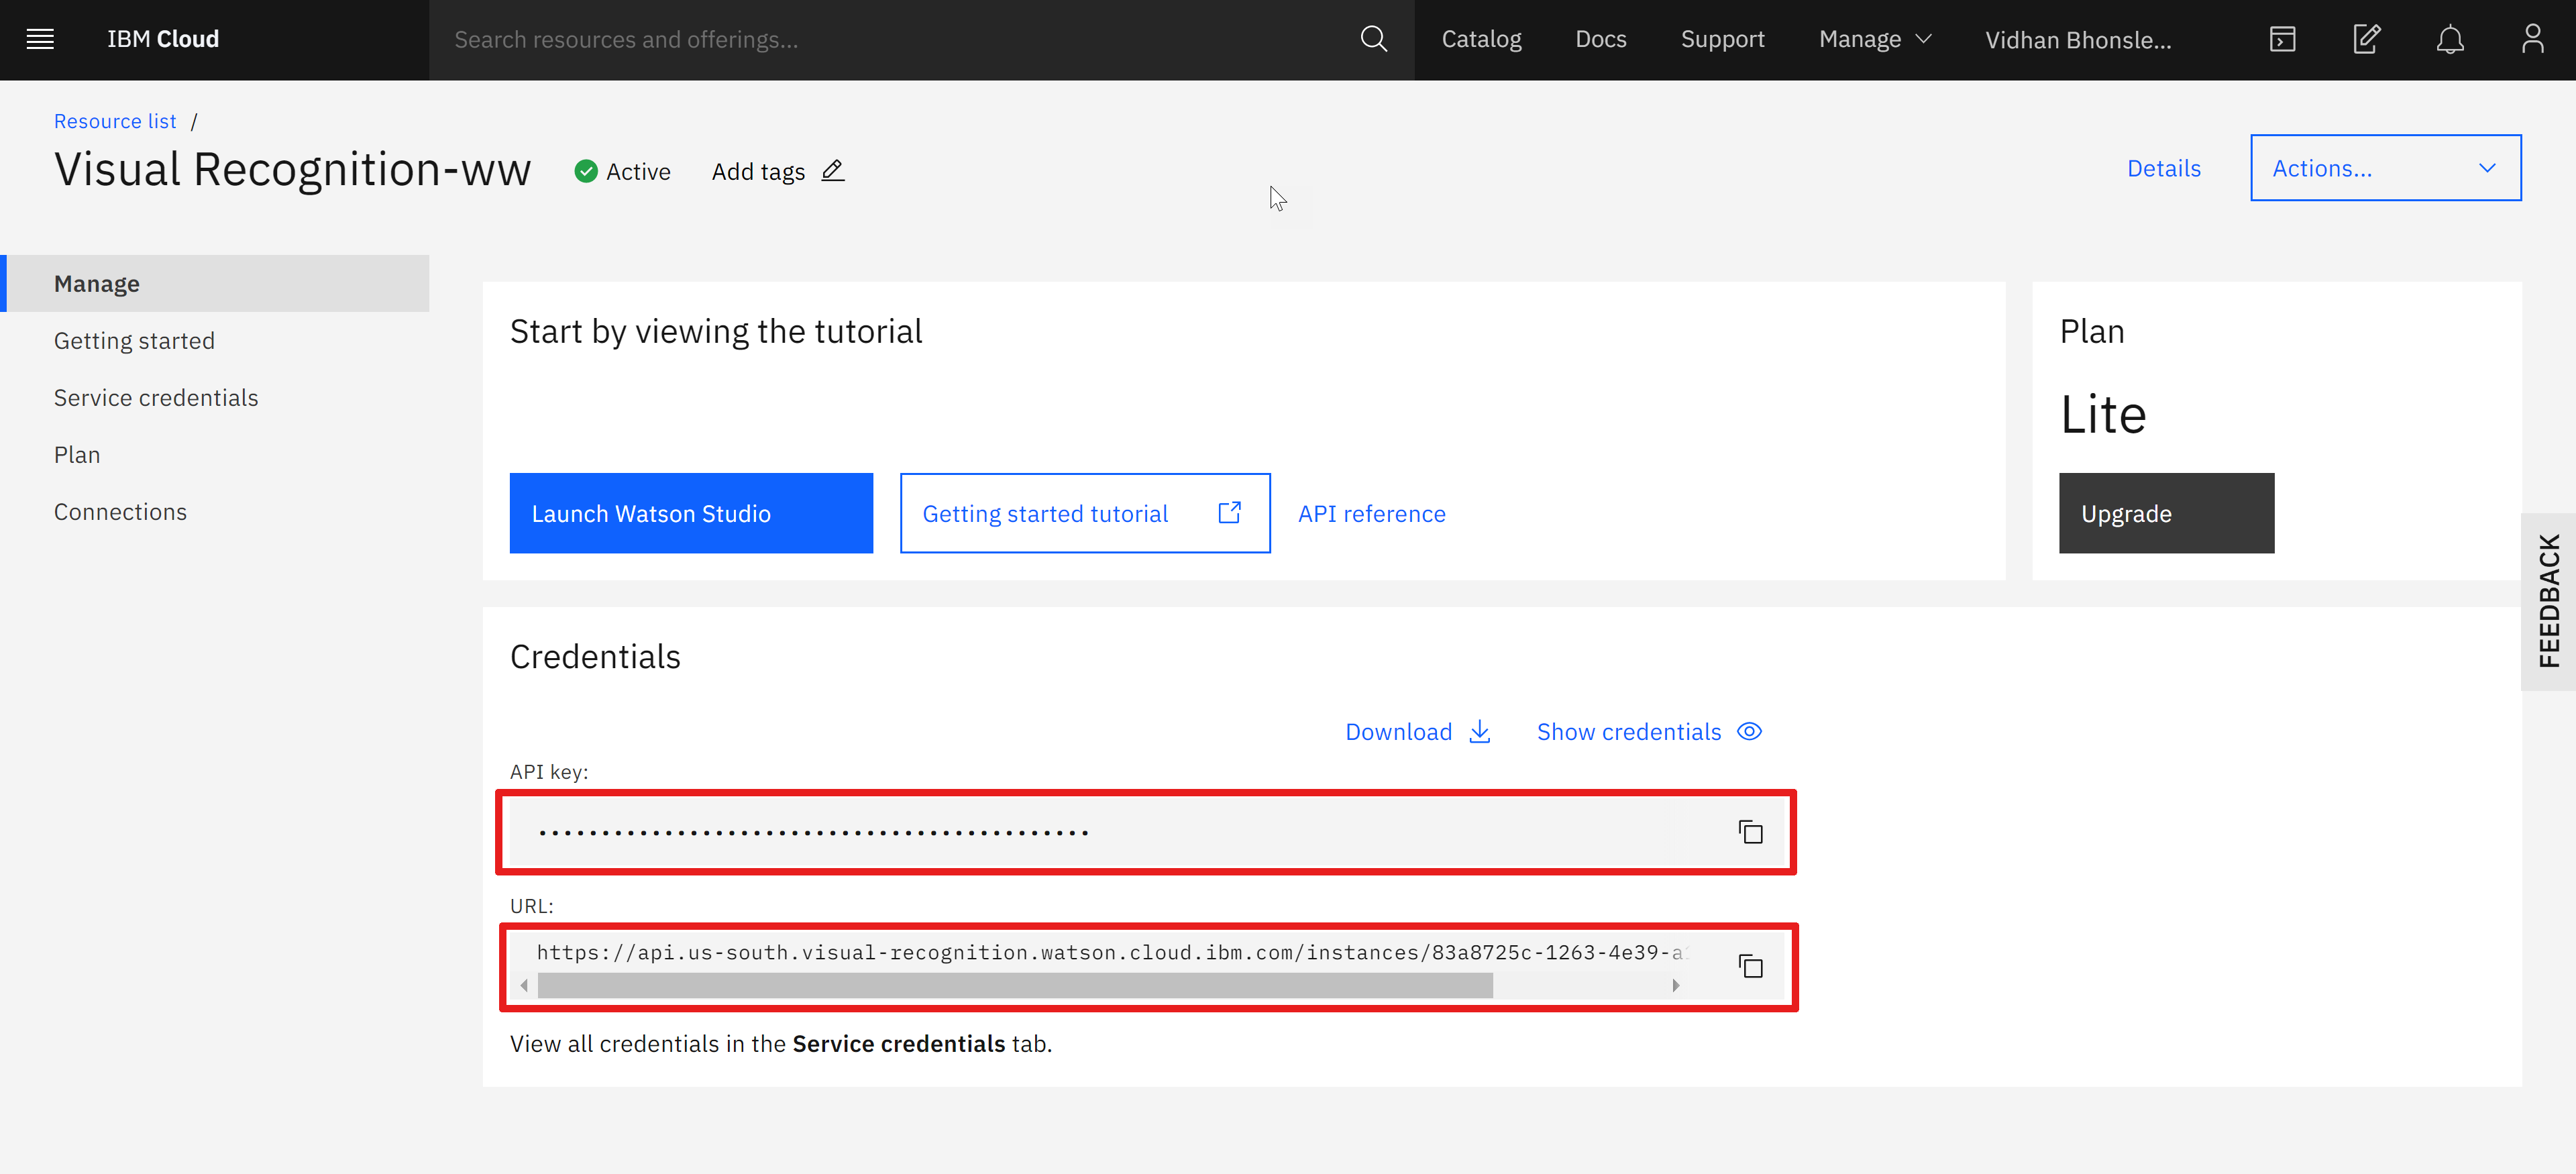
Finally, you will be on the page from where you need to copy the API key and URL. Keep both the values for further coding (represented as IBM API KEY and IBM URL later in the code).
Writing Python Code for Visual Recognition
Once you have acquired an API key associated with the Visual Recognition service, the next step is to install Watson Developer Cloud using pip:
- pip install --upgrade "ibm-watson>=4.0.1"
The library can be installed using the command prompt, terminal or a Python IDE (PyCharm, Spyder, etc), depending on how you are working with Python.
Watson's Visual Recognition comes with a number of default classification models. We will use the Food Model for recognizing images of food item.
import json
from ibm_watson import VisualRecognitionV3
from ibm_cloud_sdk_core.authenticators import IAMAuthenticator

authenticator = IAMAuthenticator('IBM API KEY')

visual_recognition = VisualRecognitionV3(
    version='2018-03-19',
    authenticator=authenticator)

visual_recognition.set_service_url('IBM URL')

with open('./test.jpg', 'rb') as images_file:
    classes = visual_recognition.classify(images_file=images_file,threshold='0.6',classifier_ids='food').get_result()

print(json.dumps(classes, indent=2))
First, you need to instantiate VisualRecognitionV3 with the version value and API key (acquired from IBM Cloud)
'test.jpg' is the image to be recognized with the help of classify(), this method accepts a JPG/PNG image. Following image is provided to test the code.
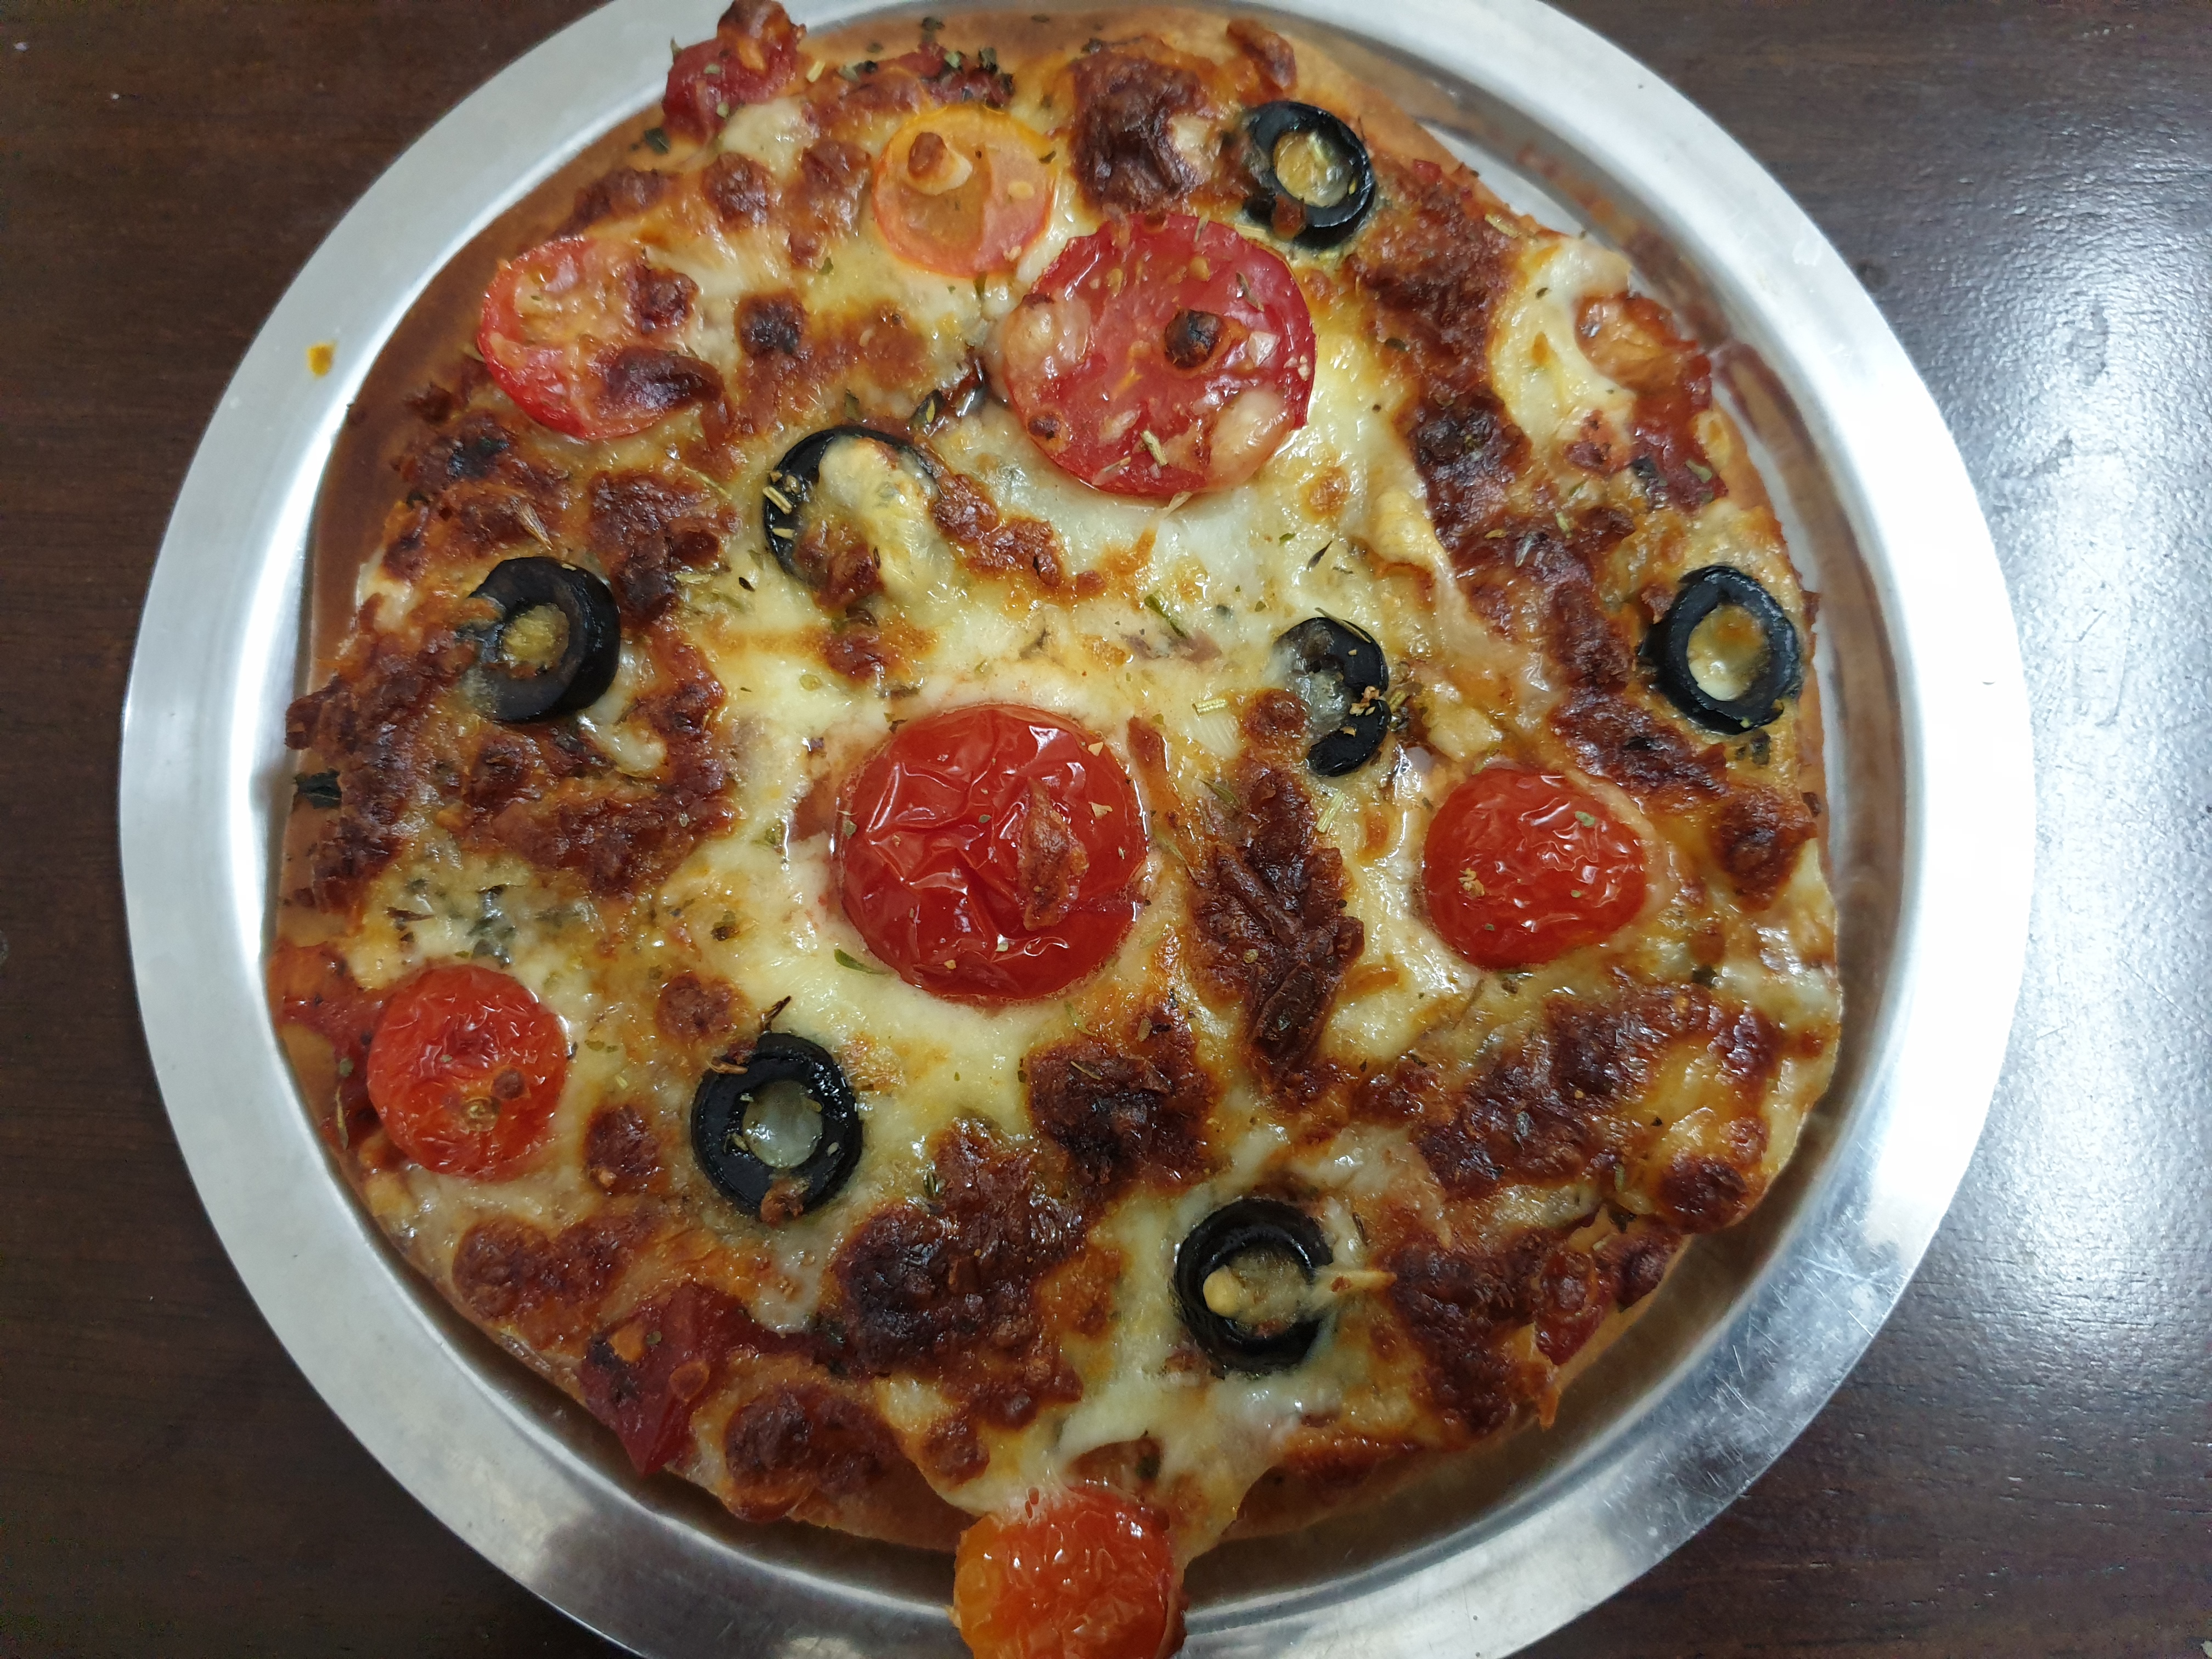
The output for the image after passing it through the food classifier:
{
  "images": [
    {
      "classifiers": [
        {
          "classifier_id": "food",
          "name": "food",
          "classes": [
            {
              "class": "pepperoni pizza",
              "score": 0.809,
              "type_hierarchy": "/pizza/pepperoni pizza"
            },
            {
              "class": "pizza",
              "score": 0.918
            }
          ]
        }
      ],
      "image": "test.jpg"
    }
  ],
  "images_processed": 1,
  "custom_classes": 0
}
The above result shows the accuracy of the built-in model and is able to give us an exact match, i.e. pizza.
Conclusion
The world is moving more and more toward automation and visual recognition is one of the best example of automation. The real question is how to use the output of Machine Learning and AI based model. We will explore the answer in the next part where we will take the name (pizza) and pass it to the HERE Location Services and Map to built an amazing recipe. A recipe to showcase the true potential of Machine Learning and AI with location services. Till then, happy learning!

Sign up for our newsletter
Why sign up:
- Latest offers and discounts
- Tailored content delivered weekly
- Exclusive events
- One click to unsubscribe