
Developers
Integrations
What made HERE switch from C++ to Rust?
Alberts Jekabsons — 23 August 2025
6 min read
24 March 2020

Have you ever seen the output of a GPS device? It's usually a set of numbers representing the geographic coordinates of a location, known as latitude and longitude. These numbers are unique and uses two-dimensional coordinates system based on the Earths surface, for example 48.2181679,16.3899064 represents a point somewhere on earth. Unfortunately, we often cannot easily understand these coordinates unless they are resolved into the closest street address. For the above mentioned coordinates, nearest address will be "Heinestraße 42, 1020 Vienna, Austria", which is way easier to understand and remember. Fortunately, we can use a Geocoding API to convert geographic coordinates into street addresses and vice versa.
In this blog post, we are going to learn how to convert the geographic coordinates of a location into a street address with the help of the reverse geocoding feature of the HERE Geocoding and Search API and the Python programming language.
Prerequisites
Since we are using Python, your machine should have Python installed (I have Python 3.8) and if you haven't done so yet, you will need to sign up for a Freemium account on developer.here.com. Once you signed up, you can generate your free API key and get 250.000 free transactions every month. Ideally you should have location data in CSV format coming in from a GPS or IoT device. But for our example we will generate our own data.
Working with Reverse Geocoding Endpoint
The reverse geocoding endpoint of the Geocoding and Search API helps in finding nearest possible address to a specific geographic coordinates. All you need is to append the latitude and longitude values with your API key to the endpoint URL.
https://revgeocode.search.hereapi.com/v1/revgeocode?at=12.98022751,77.60104064&apikey=YOUR_API_KEY
The apikey is from the Freemium account generated on developer portal and the value of at is latitude and longitude value separated by a comma.
The REST API returns a JSON response containing nearest address along with additional details.
...{ "items":[ { "title":"Union Street, Shivajinagar, Bengaluru 560001, India", "resultType":"street", "address": { "label":"Union Street, Shivajinagar, Bengaluru 560001, India", "countryCode":"IND", "countryName":"India", "state":"Karnataka", "county":"Bengaluru", "city":"Bengaluru", "district":"Shivajinagar", "street":"Union Street", "postalCode":"560001" }, "position":{ "lat":12.98025, "lng":77.60099 }, "access":[ { "lat":12.98025, "lng":77.60099 } ], "distance":6, "mapView": { "west":77.60116, "south":12.98021, "east":77.60097, "north":12.98072 } } ] }
Generating the Data
Latitude and longitude data is generally sent from a device located in field, like an asset tracking hardware or health monitoring system. The data coming to the back-end server is stored in a CSV file from where it can be further analysed. Instead of sending data from a device, we are generating and storing it in CSV format using Python.
import randomimport time
latitude = 12.9716longitude = 77.5946file_name = 'data.csv'
def generate_random_data(lat, lon, num_rows, file_name):	with open(file_name,'a') as output:    	output.write('timestamp,latitude,longitude\n')        for _ in range(num_rows):            time_stamp = time.time()            generated_lat = random.random()/100            generated_lon = random.random()/100            output.write("{},{},{}\n".format(time_stamp, lat+generated_lat, lon+generated_lon))
generate_random_data(latitude,longitude, 10, file_name)
Function generate_random_data takes 4 arguments as input; latitude, longitude, number of rows and file name, and creates a CSV file named 'data.csv'.
The file created has three columns, namely, timestamp, latitude and longitude with 10 rows of data.

Reading CSV file
There are many ways to read CSV file in Python, using Pandas library is the most efficient one. Install the library using the command
pip install pandas
For more details on how to install a library, see my previous blog in the Python blog series.
import pandas as pd
#To read 6th row datadata = pd.read_csv("data.csv",skiprows=5,nrows=1)
#To print the valuesprint(data)
#To convert values into listlist_value = data.values.tolist()
#Latitude and Longitudelatitude = list_value[0][1]longitude = list_value[0][2]
#You can print the latitude and longitude using print() function
Parsing JSON Response
After getting the latitude and longitude value from CSV, we need to pass them to the Geocoding and Search API to get a JSON response.
For making a GET request, we need requests library which can be easily downloaded using the command
pip install requests
import requests
# api-endpointURL = "https://revgeocode.search.hereapi.com/v1/revgeocode"
#API keyapi_key = 'YOUR_API_KEY'
# Defining a params dictionary for the parameters to be sent to the API PARAMS = {			'at': '{},{}'.format(latitude,longitude),			'apikey': api_key         }
# Sending get request and saving the response as response object r = requests.get(url = URL, params = PARAMS)   # Extracting data in json format data = r.json()
#Taking out title from JSONaddress = data['items'][0]['title']
print(address)
The print command at the end gives us the nearest address to the passed geographic coordinates.
Using Flask for creating a Map
What makes location data so interesting is that we can visualize it on a map and do whole bunch of other stuff with it. Now, we have all the values needed (latitude, longitude, address, API key) to show our address on a map.
For this, we need a library named flask, which can be downloaded using the command
pip install flask
from flask import Flask,render_template
app = Flask(__name__)@app.route('/')
def map_func():	return render_template('map.html',apikey=api_key,latitude=latitude,longitude=longitude,address=address)
if __name__ == '__main__':	app.run(debug = False)
The code takes us to a HTML page which renders a map for us.
Including HTML, JavaScript and Maps API
A HTML file with JavaScript code is enough to plot a beautiful looking map. The file name is map.html.
<html>  <head><meta name="viewport" content="initial-scale=1.0, width=device-width" /><script src="https://js.api.here.com/v3/3.1/mapsjs-core.js"type="text/javascript" charset="utf-8"></script><script src="https://js.api.here.com/v3/3.1/mapsjs-service.js"type="text/javascript" charset="utf-8"></script><script src="https://js.api.here.com/v3/3.1/mapsjs-mapevents.js" type="text/javascript" charset="utf-8"></script><script src="https://js.api.here.com/v3/3.1/mapsjs-ui.js" type="text/javascript" charset="utf-8"></script><link rel="stylesheet" type="text/css"href="https://js.api.here.com/v3/3.1/mapsjs-ui.css" /></head>  <body style='margin: 0'><div style="width: 100%; height: 100%" id="mapContainer"></div>
<script>	      // Initialize the platform object:      var platform = new H.service.Platform({        'apikey': '{{apikey}}'      });	  	   const lat = {{latitude}};	   const lon = {{longitude}};		// Obtain the default map types from the platform object      var maptypes = platform.createDefaultLayers();
      // Initialize a map:      var map = new H.Map(        document.getElementById('mapContainer'),        maptypes.raster.terrain.map,        {          zoom: 17,          center: { lat: lat, lng: lon }          });			// Enable the event system on the map instance:	  var mapEvents = new H.mapevents.MapEvents(map);		// Instantiate the default behavior, providing the mapEvents object:	 var behavior = new H.mapevents.Behavior(mapEvents);
	//window.addEventListener('resize',()=> get.ViewProt().resize())	var marker = new H.map.Marker({ lat: lat, lng: lon });			// Add the marker to the map:	map.addObject(marker);		// Create the default UI:	var ui = H.ui.UI.createDefault(map, maptypes);		// Add event listener to the marker:	marker.addEventListener('tap', function(evt) {    		// Create an info bubble object at a specific geographic location:		var bubble = new H.ui.InfoBubble({ lng: lon, lat: lat }, {                content: '<p> <h4>Address</h4>{{address}}</p>'             });
		// Add info bubble to the UI:		ui.addBubble(bubble);	});
</script></body></html>
The code plots the latitude and longitude on a map and shows a marker on the location. When marker is clicked, a box pops up showing the address we passed. The detailed information of Map API can be found here and of Marker, here.
Complete Python code
import pandas as pd import requestsfrom flask import Flask,render_template
#---------Reading CSV to get latitude and Longitude---------data = pd.read_csv("data.csv",skiprows=5,nrows=1)
list_value = data.values.tolist()#print(list_value[0])
#Latitude and Longitudelatitude = list_value[0][1]longitude = list_value[0][2]
#---------Making API call and JSON Parsing---------# api-endpointURL = "https://revgeocode.search.hereapi.com/v1/revgeocode"
#API keyapi_key = 'YOUR_API_KEY'
# defining a params dict for the parameters to be sent to the API PARAMS = {			'at': '{},{}'.format(latitude,longitude),			'apikey': api_key         }
# sending get request and saving the response as response object r = requests.get(url = URL, params = PARAMS)   # extracting data in json format data = r.json()
address = data['items'][0]['title']
#---------Flask Code for creating Map--------- app = Flask(__name__)@app.route('/')
def map_func():	return render_template('map.html',apikey=api_key,latitude=latitude,longitude=longitude,address=address)
if __name__ == '__main__':	app.run(debug = False)
Running the Code
Run the code using any Python IDE like Spyder or PyCharm else simple use command prompt or terminal to execute the code.

Copy the address http://127.0.0.1:5000 and paste it in the browser application.
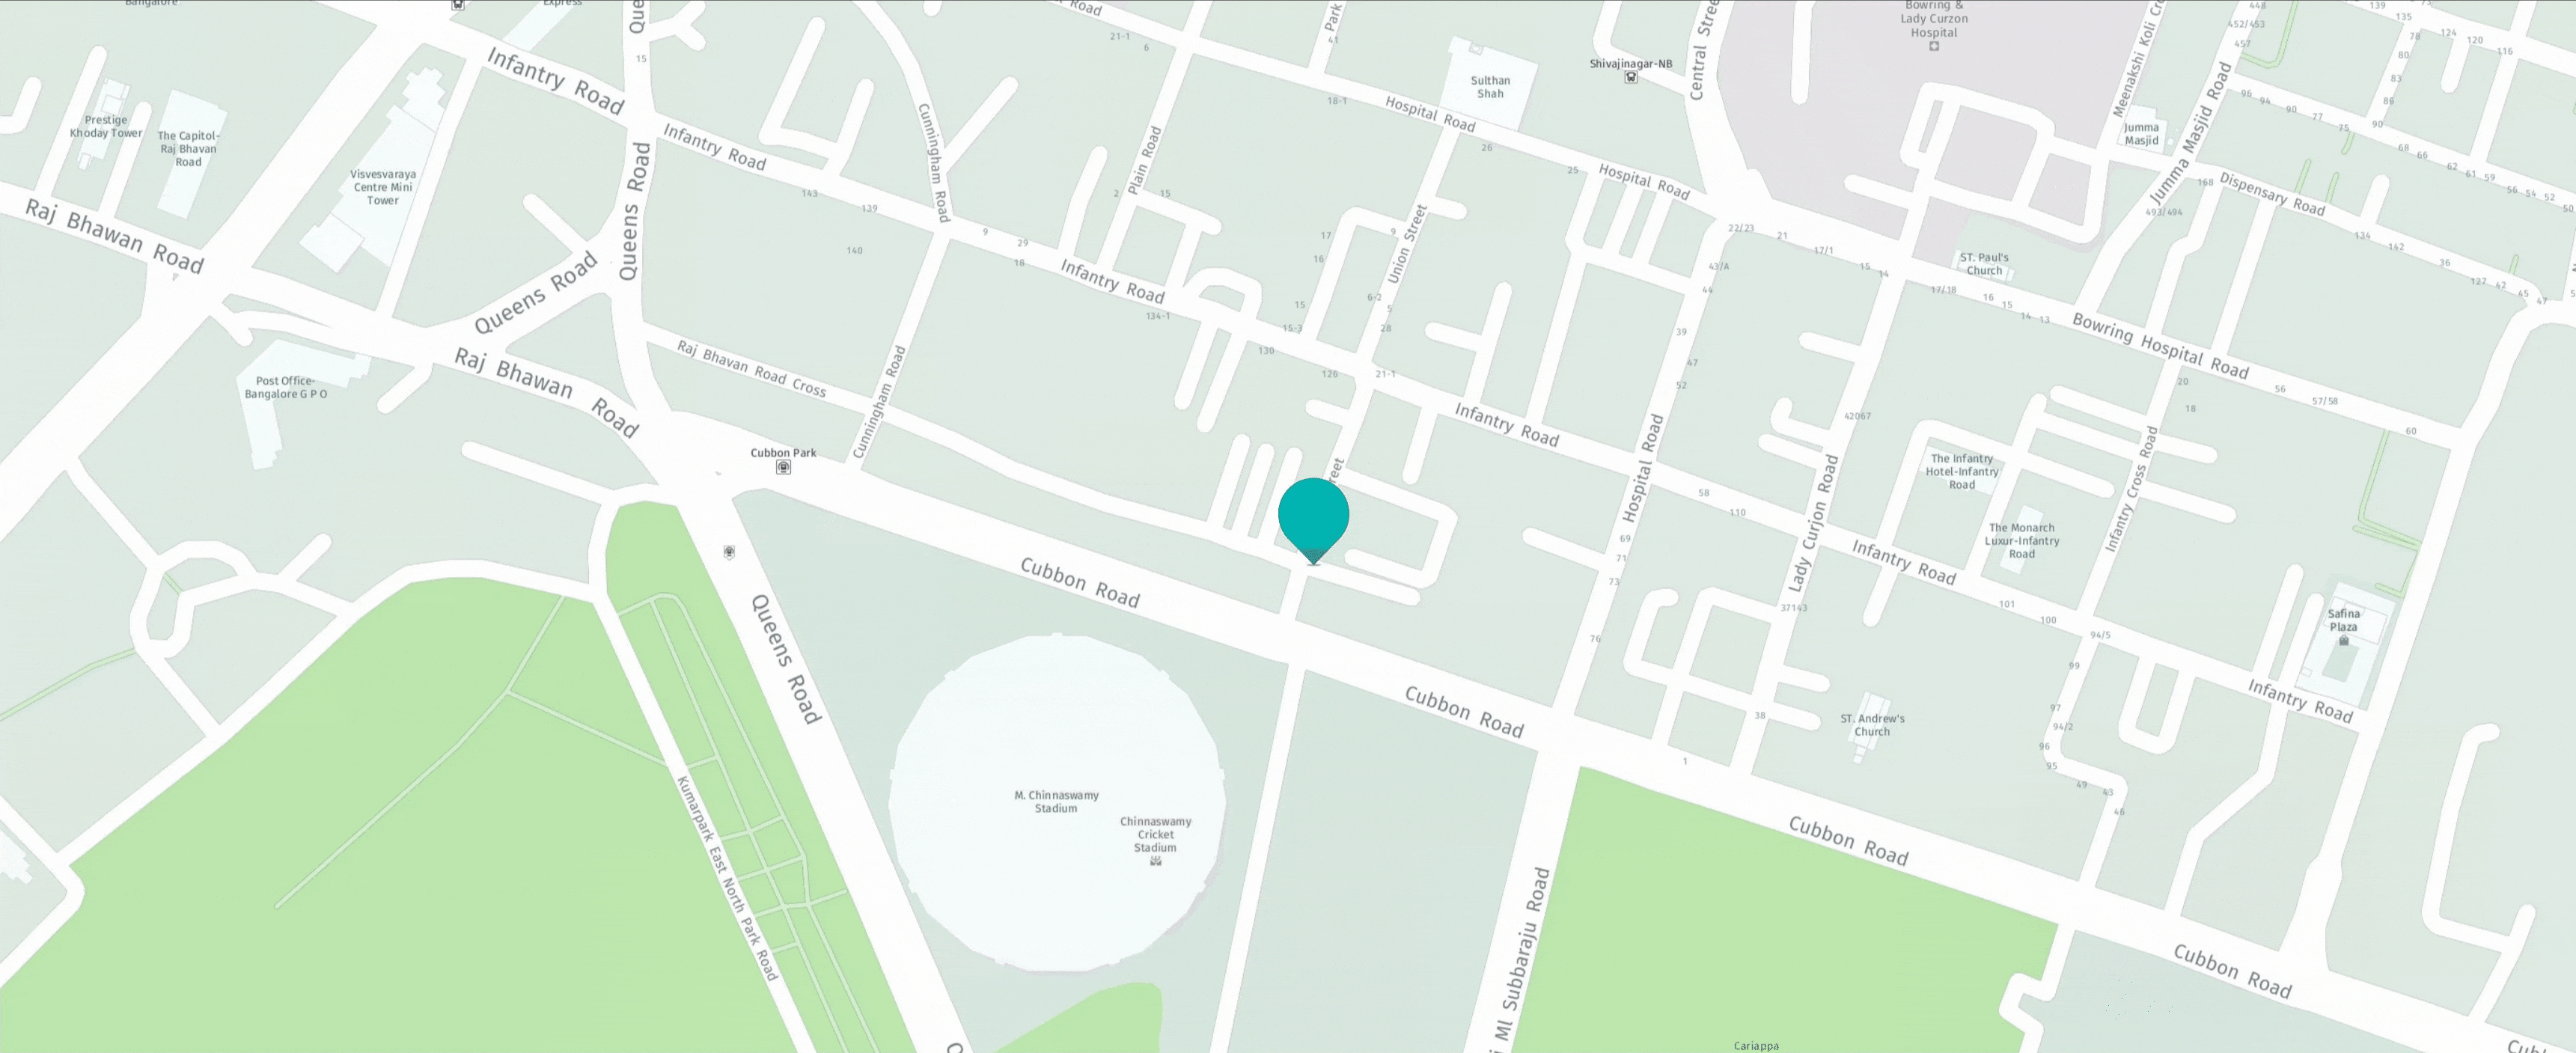
When clicked on the marker, the address passed in the code will pop up.
This concludes our tutorial on reverse geocoding a location with the help of HERE Geocoding and Search API. Now you can build your own Internet of Things Tracking Application where you can show the nearest address of an asset on the map. Stay tuned for more Python tutorials!

Vidhan Bhonsle
Share article
Vidhan Bhonsle
Alberts Jekabsons — 23 August 2025
Sachin Jonda — 13 February 2025
Alberts Jekabsons — 17 December 2024
Why sign up:
Latest offers and discounts
Tailored content delivered weekly
Exclusive events
One click to unsubscribe

