Adding Maps to Your Site

A few weeks ago I showed live on Twitch how to add maps and map data to an existing ecommerce site I created as a demo. My thinking was to create a real-world situation (a company with stores) that wanted to use maps to provide a better experience to their users. In the stream, I went through a couple of different iterations to create better and better results. Let's get started!
Let's begin by looking at our ecommerce site. Before I begin, note that all of the code I'm sharing below can all be found on my GitHub repository at https://github.com/cfjedimaster/adding-maps.
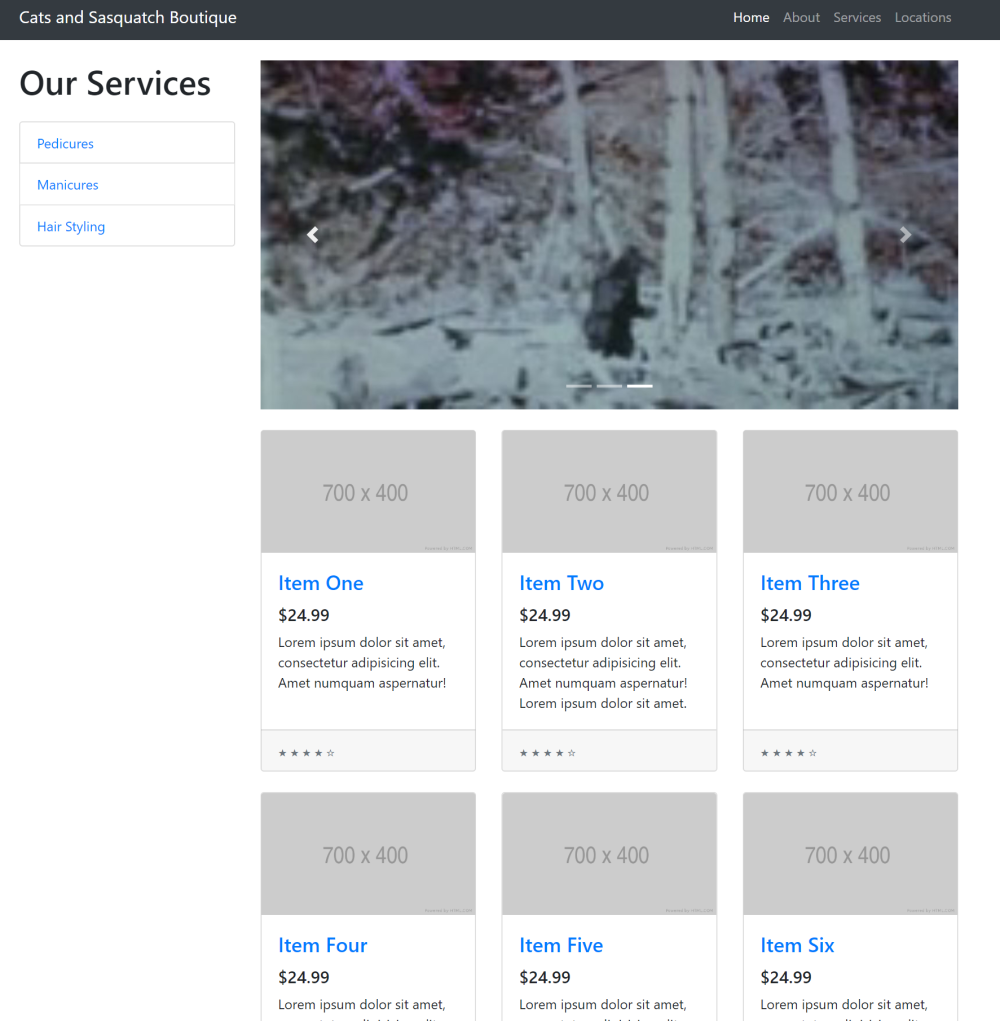
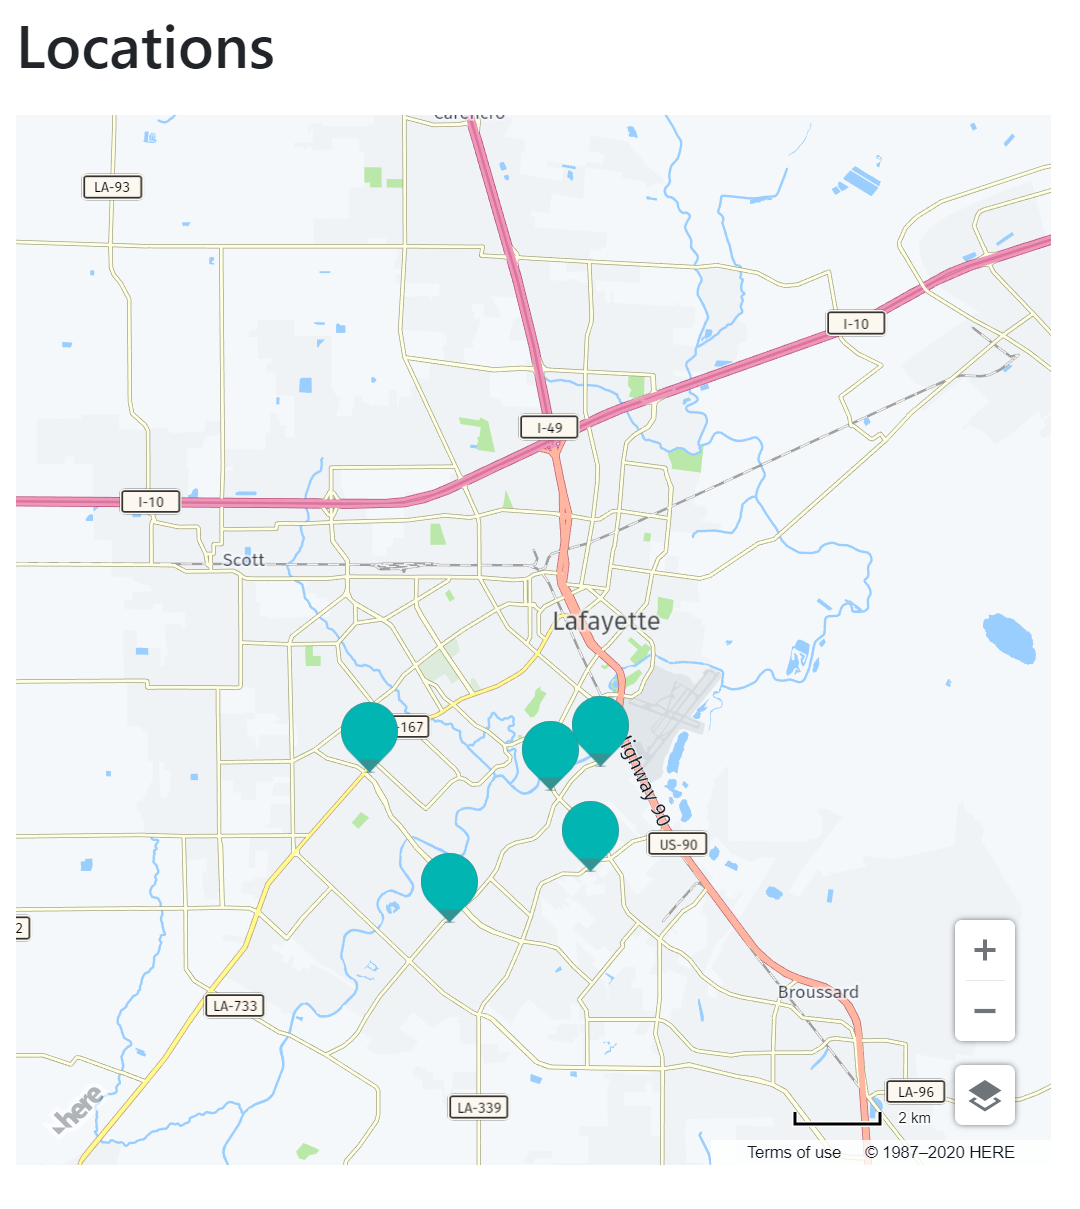
The Cat and Sasquatch Boutique (https://cfjedimaster.github.io/adding-maps/v1/) is a well-known shop providing grooming and other services to felines and members of the Bigfoot family (Sasquatch, Abominable Snowman, Yeti, and so forth). Located in southern Louisiana, they've been providing services to their community for years now but have been working to improve their online presence to help bring in new customers. None of the links actually work, but you can click on Locations to see a static list of shops and their locations:

The HTML behind this is a simple unordered list:
        <p>
<ul>
<li>2133 Kaliste Saloom Rd, Lafayette, LA 70508</li>
<li>301 Verot School Rd, Lafayette, LA 70508</li>
<li>4311 Johnston St, Lafayette, LA 70503</li>
<li>1812 W Pinhook Rd, Lafayette, LA 70508</li>
<li>600 E Kaliste Saloom Rd, Lafayette, LA 70508</li>
</ul>
</p>
This "works" in terms of the bare minimum. If I live in the area, I'll probably know those streets and know how to get there. But I have to be honest. I got these addresses from a list of local gas stations. I know each of these streets. I've lived here for twenty years. But I'd still check a map before I went to one of them. How can we make this better for our visitors? For a first attempt, and one that can be done very quickly, let's use the Map Image API. This is less of an API and more of a super-powered image service. By simply crafting the right URL and putting it in an <img> tag, you get custom maps to use in your HTML.
The URL can load a map based on a precise location, or via searching by passing in geographic values. We have a street, city, and zip, and in order to render them, we can construct a URL like so:
https://image.maps.ls.hereapi.com/mia/1.6/mapview?apiKey={KEY}&n={STREET NUMBER}&s={STREET}&ci={CITY}&zi={ZIP}
So, given our first location of "2133 Kaliste Saloom Rd, Lafayette, LA 70508", our URL could look like so (notice I've also specified a height and width):
https://image.maps.ls.hereapi.com/mia/1.6/mapview?apiKey={KEY}&n=2133&s=Kaliste+Saloom+Rd&ci=Lafayette&zi=70508&w=300&h=300
And then to use it, literally just put that in an img tag:
<img src="https://image.maps.ls.hereapi.com/mia/1.6/mapview?apiKey={KEY}&n=2133&s=Kaliste+Saloom+Rd&ci=Lafayette&zi=70508&w=300&h=300">
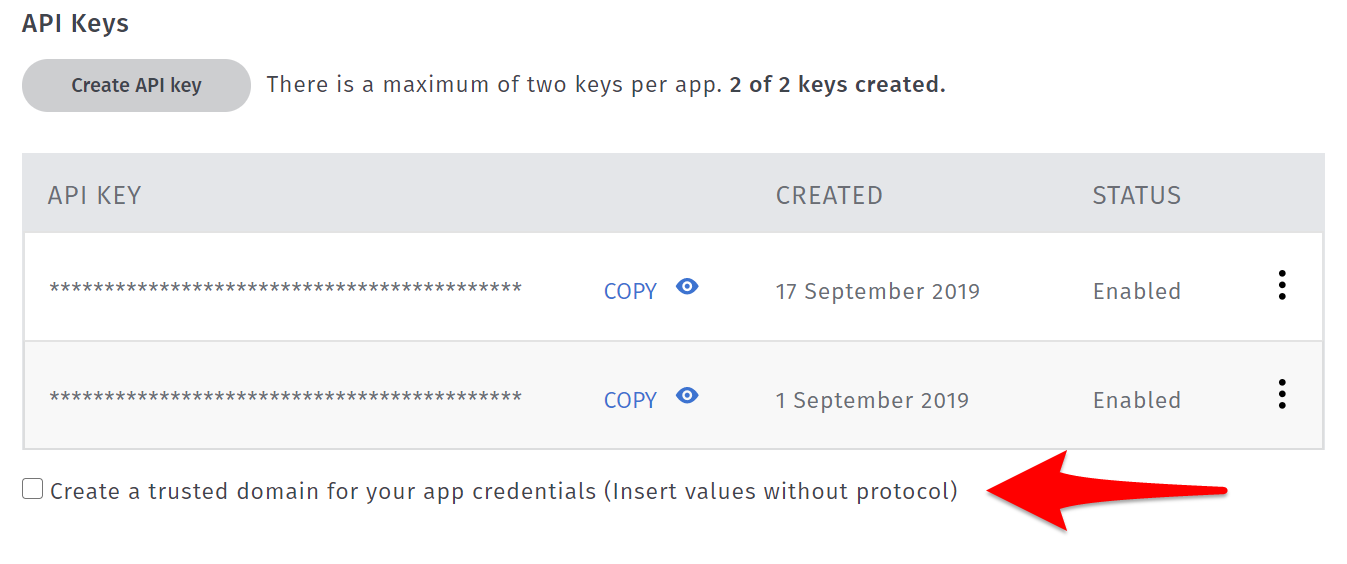
You will want to replace {KEY} with your key, and in case you're wondering, yes, it is safe to include the keys in your HTML. In the HERE Developer Portal, you can add domain restrictions to your keys so that can only be used on certain domains:
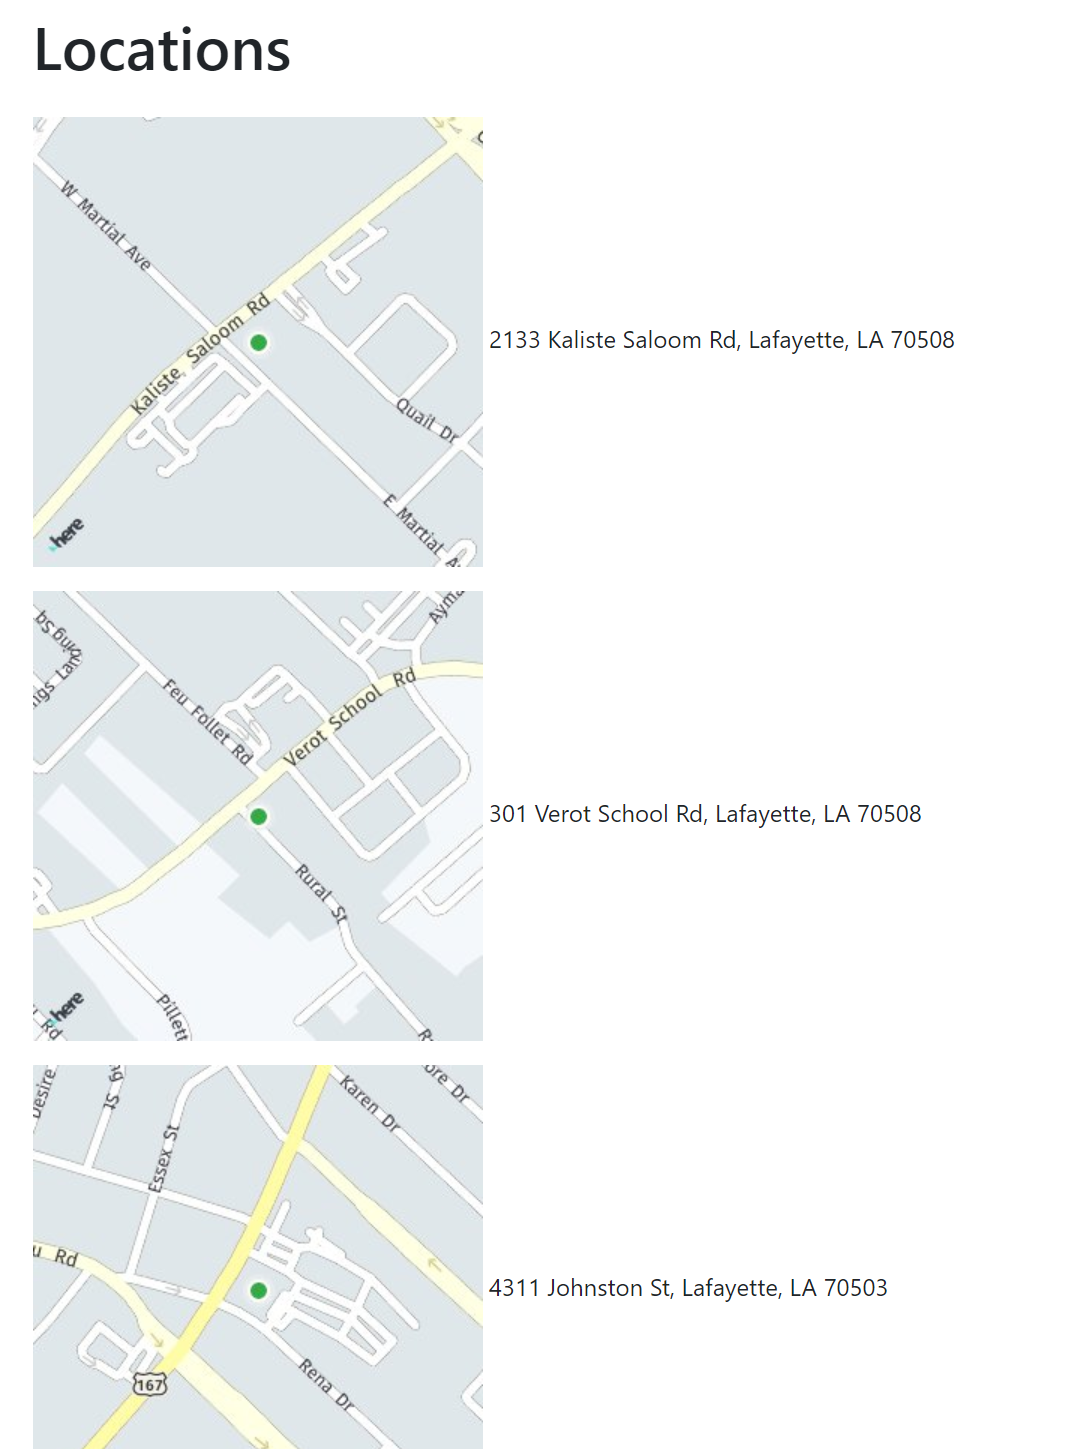
To update our rather boring list of locations we can simply add the images to our list:
        <p>
<img src="https://image.maps.ls.hereapi.com/mia/1.6/mapview?apiKey=c1LJuR0Bl2y02PefaQ2d8PvPnBKEN8KdhAOFYR_Bgmw&n=2133&s=Kaliste+Saloom+Rd&ci=Lafayette&zi=70508&w=300&h=300">
2133 Kaliste Saloom Rd, Lafayette, LA 70508
</p>

<p>
<img src="https://image.maps.ls.hereapi.com/mia/1.6/mapview?apiKey=c1LJuR0Bl2y02PefaQ2d8PvPnBKEN8KdhAOFYR_Bgmw&n=301&s=Verot+School+Rd&ci=Lafayette&zi=70508&w=300&h=300">
301 Verot School Rd, Lafayette, LA 70508
</p>

<p>
<img src="https://image.maps.ls.hereapi.com/mia/1.6/mapview?apiKey=c1LJuR0Bl2y02PefaQ2d8PvPnBKEN8KdhAOFYR_Bgmw&n=4311&s=Johnston+St&ci=Lafayette&zi=70503&w=300&h=300">
4311 Johnston St, Lafayette, LA 70503
</p>

<p>
<img src="https://image.maps.ls.hereapi.com/mia/1.6/mapview?apiKey=c1LJuR0Bl2y02PefaQ2d8PvPnBKEN8KdhAOFYR_Bgmw&n=1812&s=W+Pinhook+Rd&ci=Lafayette&zi=70508&w=300&h=300">
1812 W Pinhook Rd, Lafayette, LA 70508
</p>

<p>
<img src="https://image.maps.ls.hereapi.com/mia/1.6/mapview?apiKey=c1LJuR0Bl2y02PefaQ2d8PvPnBKEN8KdhAOFYR_Bgmw&n=600&s=E+Kaliste+Saloom+Rd&ci=Lafayette&zi=70508&w=300&h=300">
600 E Kaliste Saloom Rd, Lafayette, LA 70508
</p>
Here's the result. Note that I could absolutely lay this out a bit nicer!
You can try this online at https://cfjedimaster.github.io/adding-maps/v2/locations.html.
Alright, that's cool and all, but what if we want a more dynamic map? I mean, one that would allow the user to pan and zoom so they could plan out a route to the store. For that, we need HERE's JavaScript Maps library. Adding a map to our HTML page is relatively straightforward. First, we include the required libraries:
        <script src="https://js.api.here.com/v3/3.1/mapsjs-core.js" type="text/javascript" charset="utf-8"></script>
<script src="https://js.api.here.com/v3/3.1/mapsjs-service.js" type="text/javascript" charset="utf-8"></script>
<script src="https://js.api.here.com/v3/3.1/mapsjs-mapevents.js" type="text/javascript" charset="utf-8"></script>
<script src="https://js.api.here.com/v3/3.1/mapsjs-ui.js" type="text/javascript" charset="utf-8"></script>
<link rel="stylesheet" type="text/css" href="https://js.api.here.com/v3/3.1/mapsjs-ui.css" />
Next, I removed my previous hard coded list of locations and included an empty div for the map:
<div id="mapContainer"></div>
I used a bit of CSS to make the container sized in a nice manner:
        <style>
#mapContainer {
    width: 100%;
    height: 700px;
}
</style>
Now we need to use some JavaScript. We'll begin by adding the map:
        const KEY = 'c1LJuR0Bl2y02PefaQ2d8PvPnBKEN8KdhAOFYR_Bgmw';
var platform = new H.service.Platform({
    'apikey': KEY
});

// Obtain the default map types from the platform object:
var defaultLayers = platform.createDefaultLayers();

var map = new H.Map(
    document.getElementById('mapContainer'),
    defaultLayers.vector.normal.map,
    {
        zoom: 12,
        center: { lat: 30.22, lng: -92.02 },
        pixelRatio: window.devicePixelRatio || 1
    }
);

var behavior = new H.mapevents.Behavior(new H.mapevents.MapEvents(map));

    // Create the default UI:
var ui = H.ui.UI.createDefault(map, defaultLayers);
This is fairly boilerplate except for the center value. As my stores are in the Lafayette, LA region I've focused the map there.
Now we need to add markers for our stores. Currently we only have addresses for our stores, not longitude and latitude values. The JavaScript Maps library support our Geocoding APIs but I chose to instead use HERE WeGo. It lets you search for an address and get longitude and latitude information.
With those values, the API to add a marker is incredibly simple. Here's all the locations:
        map.addObject(new H.map.Marker({lat:30.164709, lng:-92.039268}));
map.addObject(new H.map.Marker({lat:30.174879, lng:-92.00705}));
map.addObject(new H.map.Marker({lat:30.194481, lng:-92.057503}));
map.addObject(new H.map.Marker({lat:30.19084, lng:-92.016212}));
map.addObject(new H.map.Marker({lat:30.19569, lng:-92.00473}));
And the result:
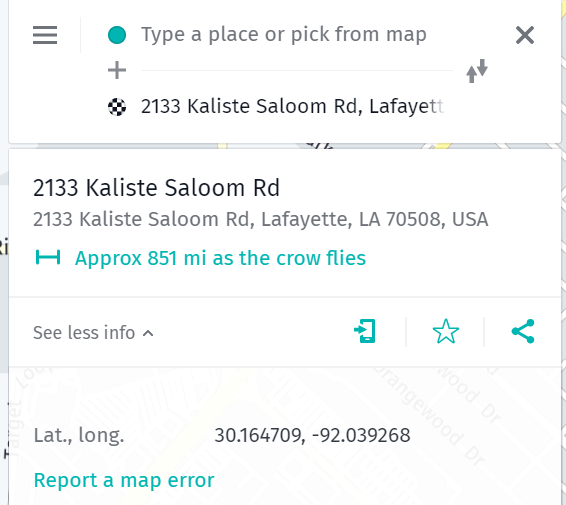
Now you can pan around, zoom in, and so forth, to get a better idea of the store's location. You can demo this yourself here: https://cfjedimaster.github.io/adding-maps/v3/locations.html There still leaves a lot to be desired though. The map has a problem I've seen on many web sites. While you can zoom in and see a precise location of a store, we've lost the street names. Consider this location:
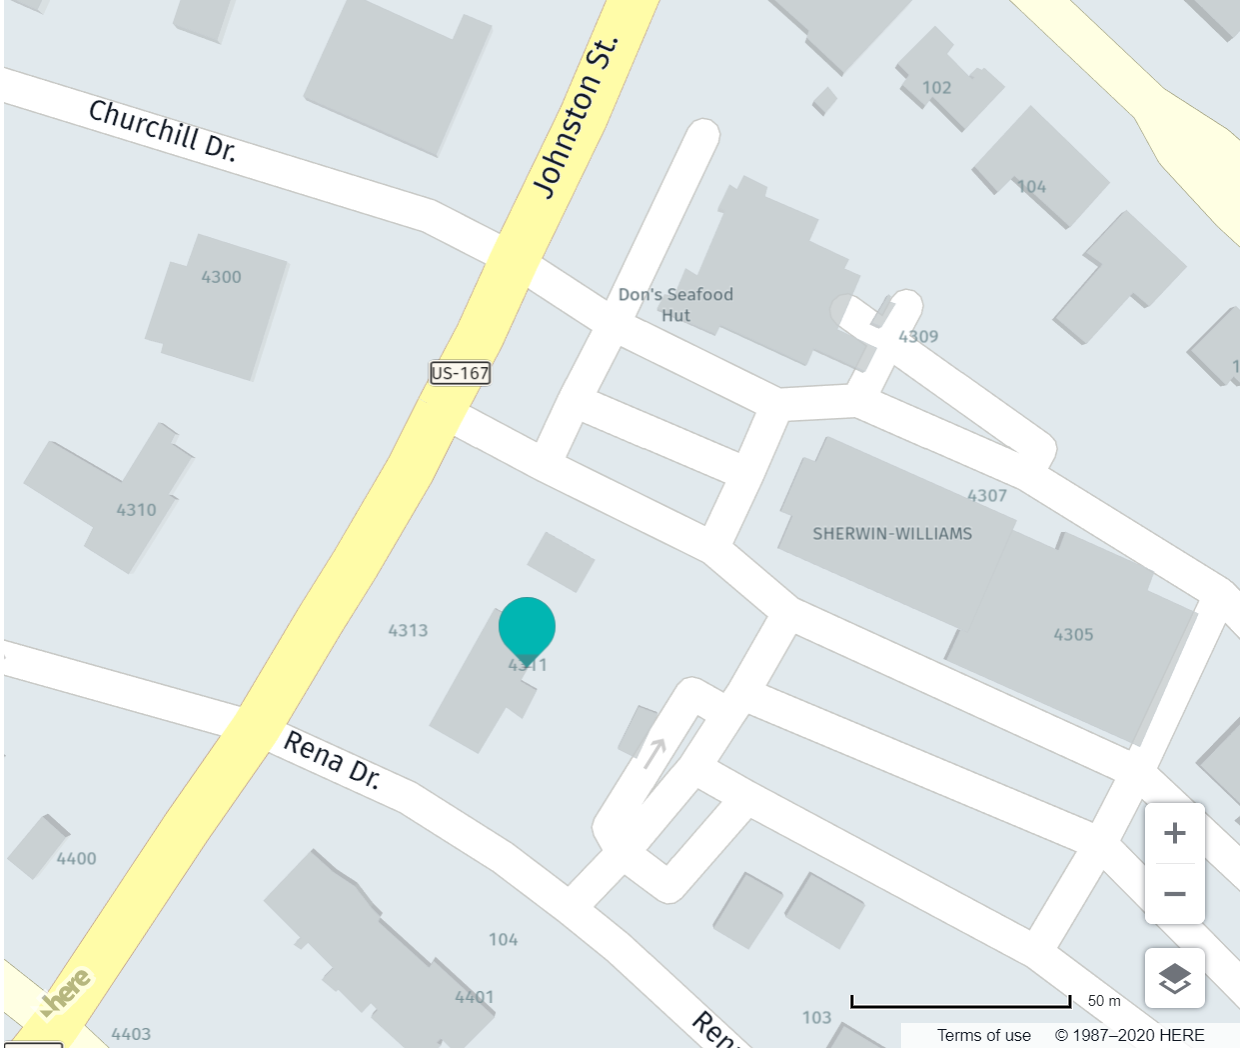
Is that on Rena Drive or Johnston Street? Also, what if our stores had different opening hours, or contact information? It would be nice to be able to get this information, perhaps on clicking those markers? Luckily the HERE Maps library provides an excellent way of doing that - Infobubbles. An infobubble is a small bubble (like speech in a comic book) that you can populate with HTML. Let's look at an updated version of our code that set the markers.
First, we'll create a group. Groups in our Maps library let you associate UI items together that share some common code. You'll see how this is used later:
var group = new H.map.Group();
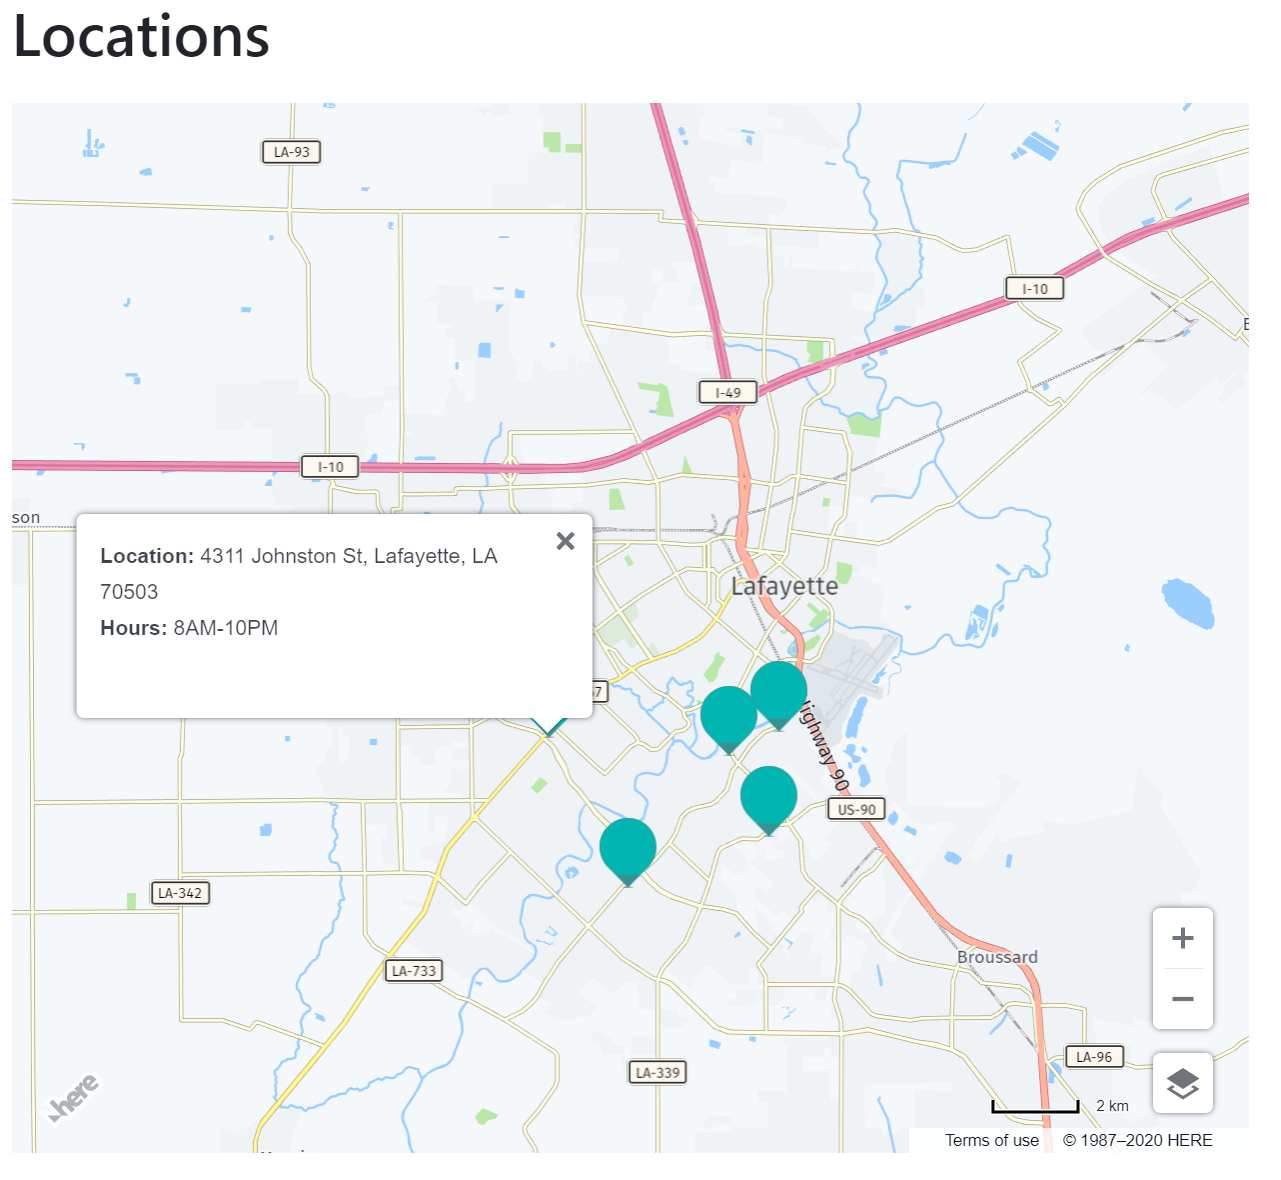
Now let's make our markers. Previous our markers were just that - a marker on the map. Now we're going to associate some data with them. Markers can have any data associated with them. I chose to use HTML that included the street address as well as hours.
        let marker = new H.map.Marker({lat:30.164709, lng:-92.039268});
marker.setData(`
<p class='infoBubble'>
<b>Location:</b> 2133 Kaliste Saloom Rd, Lafayette, LA 70508<br/>
<b>Hours:</b> 8AM-10PM
</p>
`);

group.addObject(marker);
Notice that I also added it to my group. I repeated this for all 4 locations and then simply added the group itself to the map:
map.addObject(group);
Ok, so the last bit is adding support for showing the infobubble. Luckily the API is really simple to use. Since all our markers are in one group, we can add an event listener to it directly like so:
        group.addEventListener('tap', evt => {
    // event target is the marker itself, group is a parent event target
    // for all objects that it contains
    var bubble =  new H.ui.InfoBubble(evt.target.getGeometry(), {
        // read custom data
        content: evt.target.getData()
    });
    // show info bubble
    ui.addBubble(bubble);
}, false);
When anything in the group is tapped, a new infobubble is opened and the content from the markers data is used to render the content. And that's literally it. Now when you click, you'll see information about the location:
You can play around with this yourself at https://cfjedimaster.github.io/adding-maps/v4/locations.html.
Let's recap. We began with a bulleted list of street addresses for our locations. Next, we changed them into small static maps showing the location in context of other streets in the city. The third version switched to a dynamic map with markers, but no other information was visible. The fourth version added the ability to click on a marker to see an infobubble containing the store address as well as it's open hours. For our final version, I'm really going to kick it up a notch. Let me share a picture of what we're building and then I'll explain how it was done.

What you see above is the map figuring out where I am, calculating the routes to different stores based on current conditions, and then rendering a route to the 'best' location for me if I were to hop in the car with my sasquatch for a good grooming. So how was this done? I wrote one main function to handle this process.
        async function getRoutes() {
    let myLocation = await getLocation();
    let lowest = Number.POSITIVE_INFINITY;
    let chosenRoute;

    // draw routes from me to all locations

    for(l of locations) {
        let result = await getRoute({lat:myLocation.latitude, lng:myLocation.longitude}, l.position);
        let totalTime = result.routes[0].sections[0].travelSummary.duration;
        if(totalTime < lowest) {
            lowest = totalTime;
            chosenRoute = result.routes[0];
        }
    }

    if(chosenRoute) {
        drawRouteOnMap(chosenRoute);
        document.querySelector('#routeContainer').innerHTML = `
        <p>
        <b>New Feature!</b> The closest location (based on time to arrive) is now highlighted on the map. The home icon represents your location.
        </p>
        `;
    }
}
The function begins by firing off a request to getLocation, which uses the browsers geolocation API to get my position. Once it has it, it can then fire off multiple requests to our routing API. Here's getRoute:
        async function getRoute(from, to) {
    var routingParameters = {
        'routingMode': 'fast',
        'transportMode': 'car',
        // The start point of the route:
        'origin': `${from.lat},${from.lng}`,
        // The end point of the route:
        'destination': `${to.lat},${to.lng}`,
        // Include the route shape in the response
        'return': 'polyline,travelSummary'
    };

    return new Promise((resolve, reject) => {
        router.calculateRoute(routingParameters, r => resolve(r), e => reject(e));
    });
}
Each call to getRoute returns route data that includes the duration of the route. By looping over the results, I can then figure out the quickest one. I update the HTML and call drawRouteOnMap to render the route data returned by the call. Here's that function:
        function drawRouteOnMap(route) {
    route.sections.forEach((section) => {
        // Create a linestring to use as a point source for the route line
        let linestring = H.geo.LineString.fromFlexiblePolyline(section.polyline);

        // Create a polyline to display the route:
        let routeLine = new H.map.Polyline(linestring, {
            style: { strokeColor: 'blue', lineWidth: 3 }
        });

        var icon = new H.map.Icon('img/home.png');

        // Create a marker for the start point:
        let startMarker = new H.map.Marker(section.departure.place.location, { icon:icon});


        // Add the route polyline and the two markers to the map:
        map.addObjects([routeLine, startMarker]);

    });
}
The combination of the routing result data and the power JavaScript library makes this all rather simple. Note that this approach wouldn't be sensible if you had a large number of stores. With a few locations though it runs quick enough to be near instantaneous. You can try this yourself but be prepared for slightly longer routes. Our code could actually handle using a "sanity check" where if your location was more than one or two hundred miles away the routing isn't displayed. Here's the demo: https://cfjedimaster.github.io/adding-maps/v5/locations.html
I hope you found this walkthrough interesting. The entire repo can be found here: https://github.com/cfjedimaster/adding-maps. Don't forget to sign up for a free developer account and reach out to us on Twitter if you have any questions about this code.

Have your say
Sign up for our newsletter
Why sign up:
- Latest offers and discounts
- Tailored content delivered weekly
- Exclusive events
- One click to unsubscribe